Each player draws a card which details how much of their troops are on the board at the start of the game, and when the rest arrive as reinforcements.
At the beginning of the game, each player deploys everything on the table, and after the first turn the 'phantom wings' disappear and turn up later as reinforcements. So it creates an interesting 'fog of war' effect in that neither side knows exactly what size force they're facing at the start of the battle.
I played the French and Michael played the British.

The set up: The two forces met each other across a main road between two towns, surrounded by farmland. In VnB terms, the crop fields count as standing crops, vineyards and plowed fields are broken ground, all woods counted as orchards and the river in this case was a stream.
The road section between the two towns was lined by trees and blocked line of sight.
The British cavalry deployed on their left flank, giving me great cause for concern. I decided that the most obviously defensible position was to hold the line of the stream with my infantry, and deployed accordingly.
My right flank was infantry-heavy, with all my cavalry on the left. The British set-up opposite was similar.

The British army, looking scary as they form up behind the defensive terrain.

The French right - two division of infantry. Suspiciously light in artillery...

The French left, light cavalry and dragoons.

The British right. One brigade of reserve cavalry in the centre of the lines, deployed on the reverse slope of the hill.

How many thin red line references is too many?

Off to the races! I went first and pushed the French up the board, determined to claim the line of the stream, and get my infantry out of the way of the British cavalry division. The one infantry division on the far right went stationary to try and hold the flank.


The British right flank was devoid of cavalry, so I rushed up my two divisions to threaten their line.

As I expected, the British crossed the stream on the left with their cavalry, but played it cautious on the right.

"The noblest cavalry in all of Europe, and the worst led."


At the end of the first turn, we both removed the 'phantom' troops that would arrive as reinforcements later. In the French case, this was the reserve - including the dragoon division and a couple of extra pieces.
In the case of the British, all but their right wing (one division!) vanished from the battlefield.

The British advance guard, determined to hold their line of communication.

Seeing that I had an immediate advantage in numbers, I advanced the French as quickly as possible to try and destroy the British.

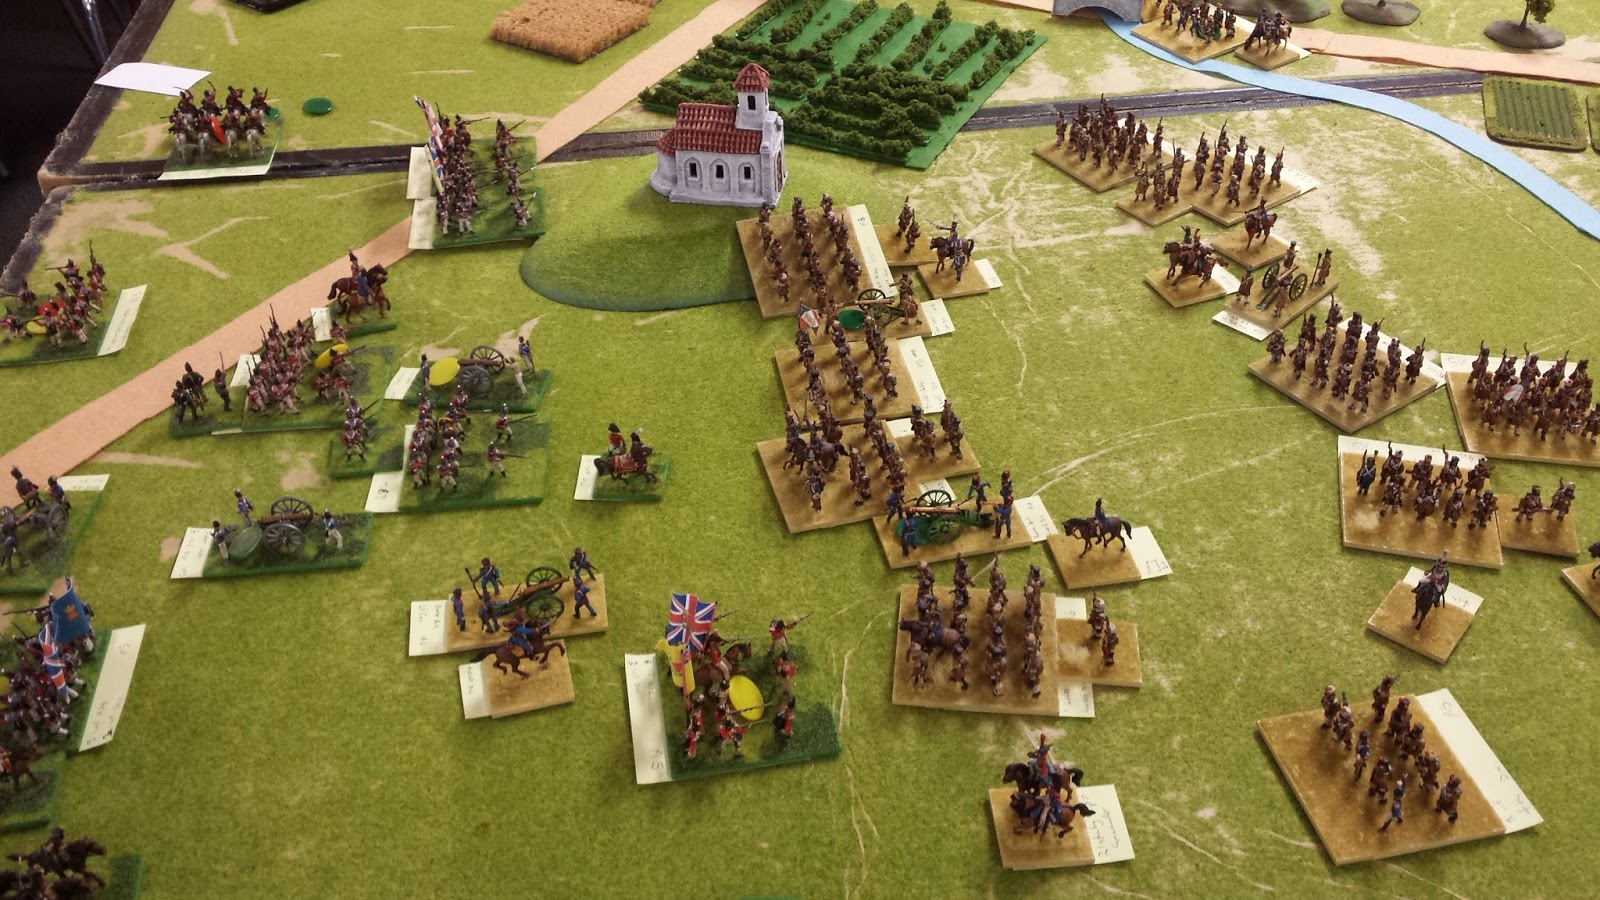
French light cavalry attempting to encircle the British.

The British opted to stay where they were (smart move) but it gave the French a chance to get around behind with their horse artillery.

No point holding that stream anymore...

I brought up the lead divisions and deployed the guns, expecting British reinforcements to turn up at any moment.

Which they did, in the form of the British cavalry, who quickly set about making short work of my light cavalry.
More surprisingly, Michael decided that the best defense is a good offense, and decided to charge my advancing line with his infantry.

For the most part, the French line held and counter-charged the British the next turn.

The French counter-attack goes well, with the annoying horse artillery behind the British lines wreaking havoc on their morale.
On the far left of the French lines, the Young Guard division gave the British a tough fight.

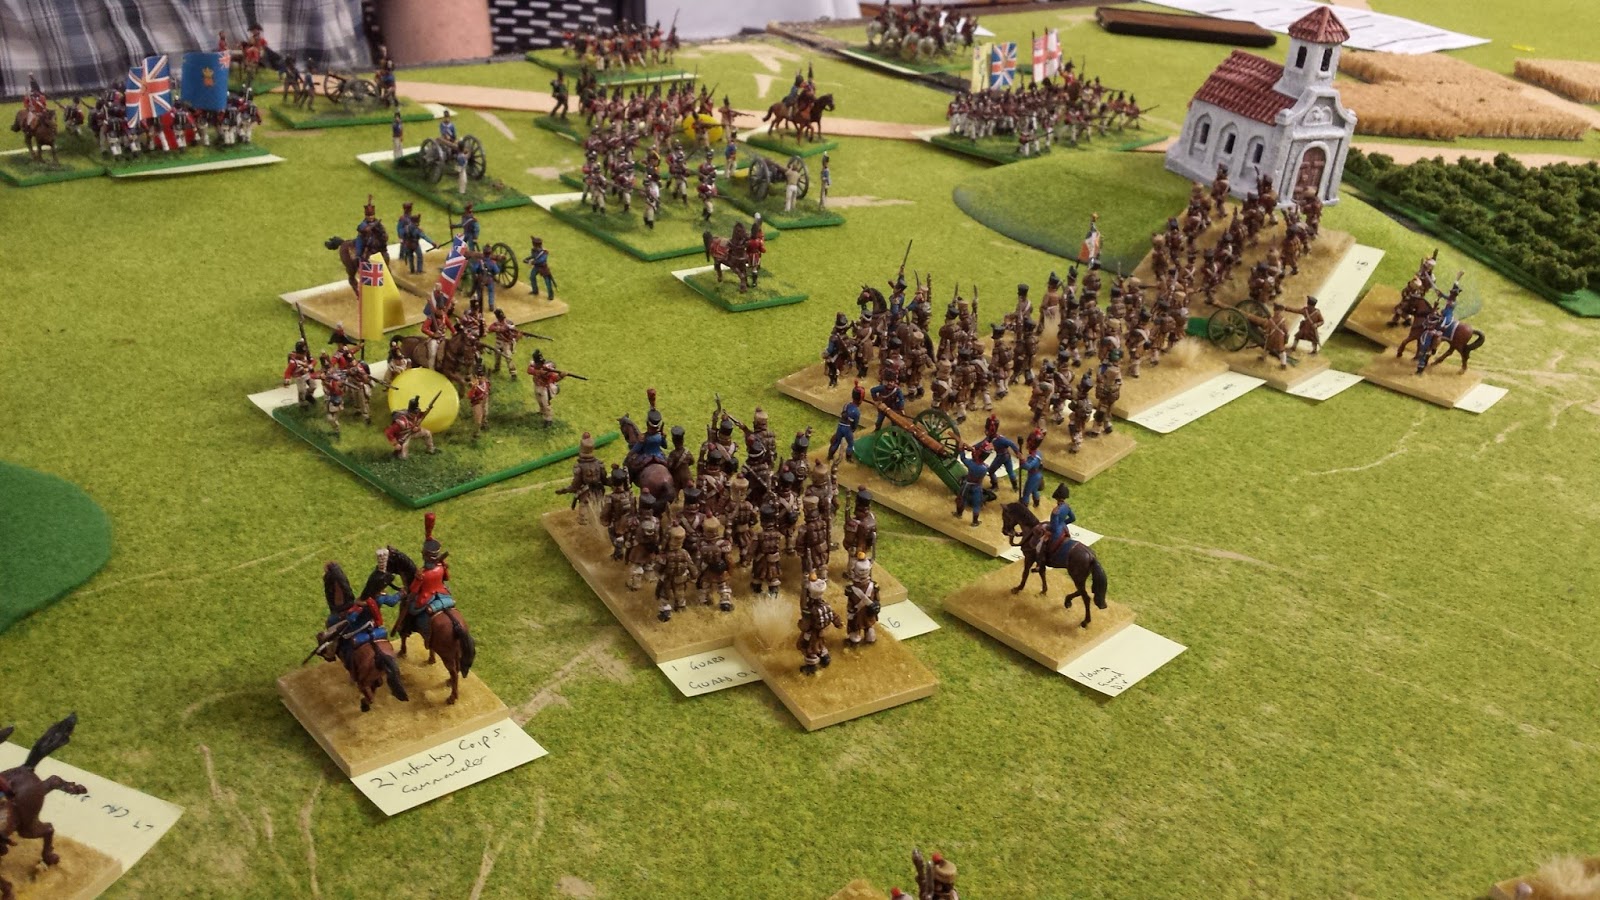
And then in came the British cavalry to punish the French for their efforts. Meanwhile, more infantry reinforcements arrived on the road in the form of the 1st Division, including the Guards.


The arrival of more British reinforcements turned the battle into a bit of a meatgrinder.

The French right wing advanced up the British left to hold the town and stop British troops coming down the road to out-flank the French.

French cavalry reinforcements arrived and the dragoons made their way up the left flank. The British cavalry charge was having mixed results but the biggest problem was that they were packed in too close. With the British army funneled into a bottleneck between the orchard on one side and the hill on the other, every British stand forced to retreat from combat tended to disorder the troops behind it.

In the face of combined infantry and artillery, the British cavalry is pushed back.


As the French counter-attacks meet serious resistance from the British, the French artillery units are exposed and the British close in, clearing out the guns and putting a big dent in the French offensive power.


But doing so leaves the British artillery open to attack by the French dragoons on the left flank, and to heavy musket fire from the combined French infantry line. The British cavalry are all but cleaned up.

British reinforcements have held off the French advance, and the two armies form up into opposing lines.

While the British centre is strong with reinforcements, the flanks are held by exhausted divisions of infantry who have been pushed back fighting the initial French attack. The French attempt to encircle the lines and turn the flanks. An infantry division advances on the right and the dragoons on the left.

The British bring up an infantry division through the orchard to threaten the French right. The remaining British reserve cavalry stand clear off the French Hussars hiding on the far edge of the battlefield.

I responded to this by sending the dragoons to finish off the British on the the left, but before I could blow them to pieces with artillery they routed and ran off the board. I wasn't too upset about that though.

A scary amount of dragoons.

Seeing they were about to be surrounded, the British attempted to break out by charging in with one of their fresh divisions.

Michael attempted to push back some of the French infantry advancing on his left flank,...

... but didn't have a lot of luck as the French repelled his attacks. However, as grim as the situation looked on the left, it wasn't over. As the French infantry charged in, the bungled their attack and were seen off in disorder by the valiant British.
A counter-charge by the Highland brigade supported by artillery into the disordered Frenchmen routed the French division and the left flank turned from a desperate defense into a futile musket-duel.

The British attack in the center started to have serious effects on the French lines. It looked like the British were turning this around as the French attack started to crumble.

The French dragoons attacking to the flank smashed through the exhausted British trying to hold the flank, causing several brigades to rout off the board.

The French desperately try to reform their lines as the British infantry charge, but are there enough British left to exploit the breakthrough?

The British left - the French attack on this flank has all but failed, but the dragoons have broken through on the opposite flank.

The French dragoons start cleaning up. With no British troops left to hold the LOC, the road is now in French hands.

The French troops surround the remaining British in the center of the line, cutting them to pieces with musket and cannon fire.
At the end of the game, the only division on the board not exhausted was the French dragoons, having broken through the British flank, captured the LOC and torn up the middle of the British lines.
A close and bloody battle, but a victory for the French.
This was a great battle for both sides. The reinforcement rules worked well and were pretty easy to understand. Best of all there were lots of occasions where it looked like one side was winning, but the situation would quickly change into an advantage for the other side. I hate playing wargames where one side gets the upper hand early in the game and the rest of the battle is a foregone conclusion so this was excellent.
Here are the armies we used:
